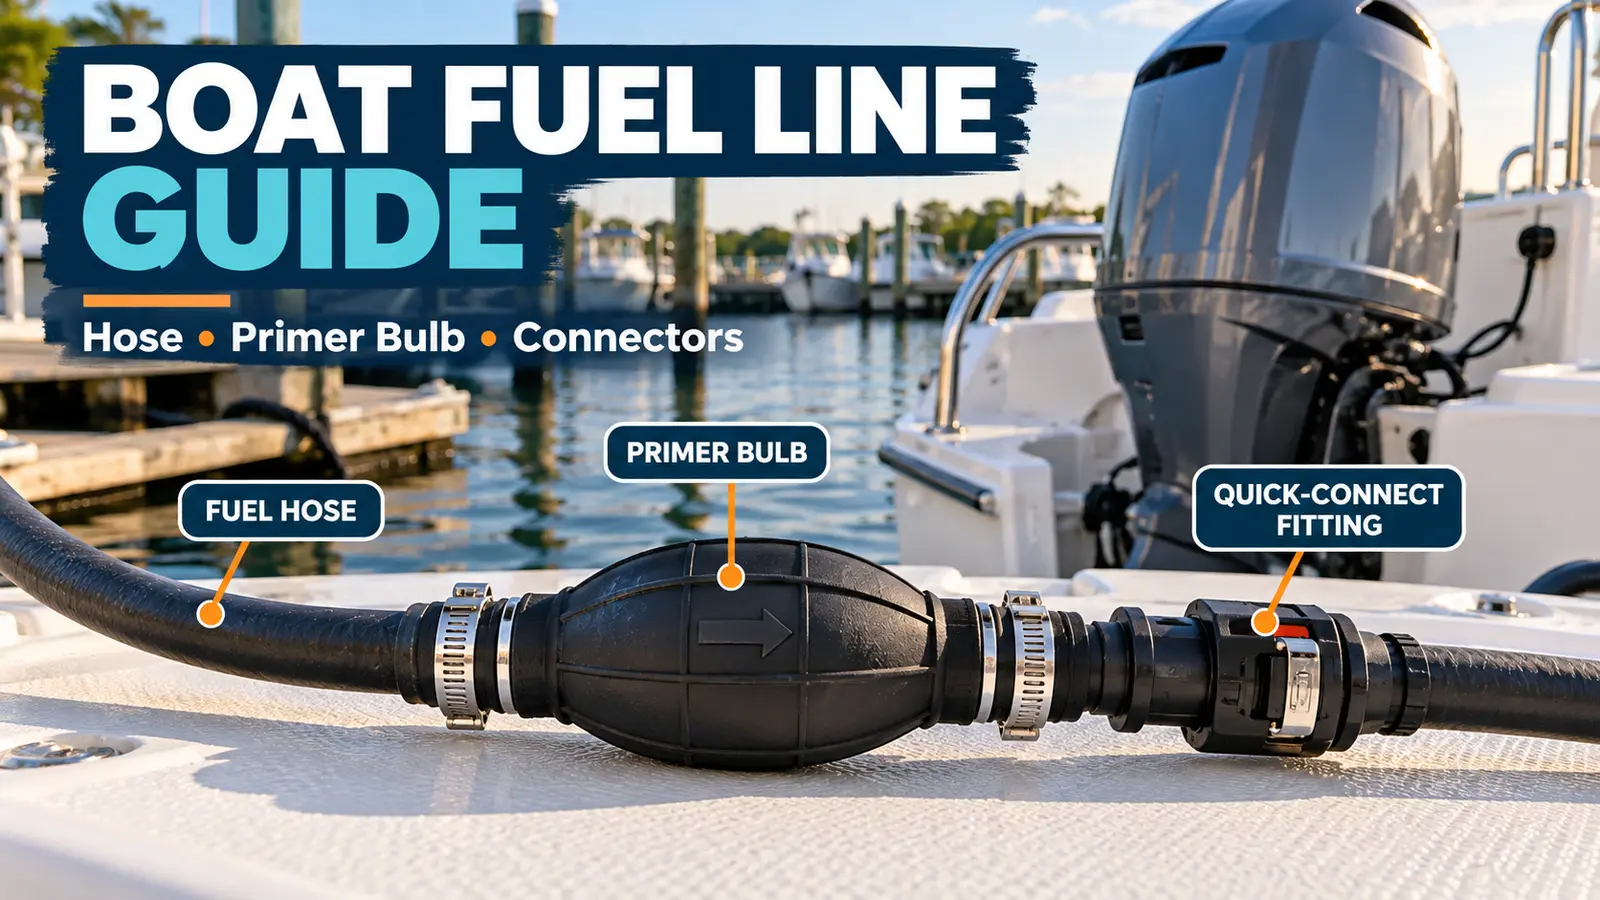
Topic-led editorial image identifying the hose, primer bulb and connector. It is not an installation diagram or a specific product endorsement.
A boat fuel line should be selected as a complete, manufacturer-approved path from tank to engine: the correct marine hose rating and inside diameter, compatible tank and engine connectors, the specified primer bulb where required, secure support and a route protected from heat, abrasion, kinks and moving parts. If you smell gasoline, see wetness or find an undocumented fixed system, do not start the engine. Treat it as a stop condition and follow the boat and engine manuals.
Quick answer: verify these eight items
- Exact engine: model, fuel requirement and fuel-inlet specification.
- System arrangement: portable tank, permanent tank or builder-installed distribution system.
- Hose rating: the USCG hose type required for that location, not merely a fuel-resistant-looking hose.
- Inside diameter: the size stated by the engine and system makers.
- Connections: matched tank-side and engine-side connector families, fittings and seals.
- Primer bulb: correct specification, flow direction and location if the system uses one.
- Route and support: no kinks, chafe, hot surfaces, sharp edges or strain at fittings.
- Inspection result: no cracking, hardening, softness, swelling, wetness, staining or gasoline odor.
Map the complete fuel path before buying a part
A boat fuel line is not only the flexible hose visible beside an outboard. The working path may include a tank pickup, shutoff or anti-siphon device, fittings, hose, clamps or swaged ends, primer bulb, water-separating filter, quick connectors and engine-side components. One wrong interface can admit air, restrict flow or leak fuel.
Start with the Boat Fuel Tank Guide if the tank type, venting or capacity is still undecided. Then draw the line path and record every part number or readable marking. Do not assume two connectors match because they click together or because their outside shapes look similar.
| Part of the path | What to record | Common decision error |
|---|---|---|
| Tank or pickup | Tank model, outlet or pickup specification, venting design | Choosing a connector from appearance alone |
| Flexible hose | Readable USCG type, inside diameter, maker and condition | Using automotive or general-purpose hose |
| Primer bulb | Part specification, flow arrow, position and condition | Installing a generic bulb in the wrong direction |
| Quick connectors | Tank-side and engine-side families, seals and latching condition | Mixing similar-looking generations or brands |
| Filter or separator | Head, element, port and service specification | Adding restriction without checking engine guidance |
| Engine inlet | Exact outboard model and required line specification | Guessing size from horsepower alone |
Understand USCG fuel-hose ratings without guessing
Federal boat-manufacturing requirements in 33 CFR 183.558 distinguish hose applications and ratings. The regulation requires USCG Type A1 between a fuel pump and carburetor. For vent, fill and tank-to-engine lines, the allowed A or B types depend on the exact location and whether the severed-hose drainage condition in the rule is met. That is why a label should be read in context rather than treated as a universal good-better-best scale.
| Marking | What the code indicates | Owner takeaway |
|---|---|---|
| USCG Type A1 | Referenced for locations requiring the higher fire-test performance and for pump-to-carburetor hose | Use it where the boat, engine or applicable standard requires it; do not downgrade |
| USCG Type A2 | Permitted by the rule for some fill or vent applications | It is not automatically a tank-to-engine substitute |
| USCG Type B1 | Permitted in specified tank-to-engine, fill or vent arrangements when the drainage condition is satisfied | The system design determines whether B1 is allowed |
| USCG Type B2 | Addressed for specified fill or vent applications | Do not use the number alone to choose a supply line |
The same subpart also addresses how hoses are secured and how clamps sit on fittings. 33 CFR 183.560 says a clamp must be used with hose designed for clamps, positioned beyond the bead, flare or over fitting serrations, and not rely only on spring tension. These are manufacturer-level rules, not a torque recipe for owners. Use the part and vessel instructions for the actual connection.
Choose inside diameter from the engine specification
There is no universal “standard” boat motor fuel line size that is safe for every outboard. Required diameter depends on the engine's fuel demand, the complete run, filters, fittings and the manufacturer's design. A hose that is too small or a connector with a restricted passage can contribute to fuel starvation. A hose that is too large for a fitting is not made correct by adding clamp force.
- Find the exact outboard model and serial range.
- Use its current owner, rigging or installation documentation.
- Confirm the specified inside diameter and any maximum length or filter requirements.
- Match every fitting and connector to that hose and the tank arrangement.
- Do not reduce or enlarge the path at random to reuse an old component.
If the documentation is missing, the system has been modified or the existing hose markings are unreadable, have a dealer or qualified marine technician identify the path before ordering. Measuring only the old hose can reproduce an earlier mistake.
Primer bulb: what firm, soft and collapsed can mean
A primer bulb is a directional hand pump used on many portable and remote outboard fuel-line assemblies. Follow the arrow and engine instructions. On common assemblies, the marked flow direction is from tank toward engine. Its job is to fill the downstream path before starting as directed by the engine maker, not to act as a permanent diagnostic gauge.
Yamaha's official fuel-system maintenance guidance says to inspect fuel hoses and connections before every trip. It also says that when a primer bulb does not become firm before starting, owners should check for a possible fuel-system leak and, if none is found, replace the bulb.
Bulb does not get firm
- Tank empty or pickup not supplying fuel
- Vent closed or obstructed where applicable
- Bulb reversed, damaged or wrong for the system
- Loose connector, seal or fitting admitting air
- Leak, restriction or another upstream problem
Bulb collapses while running
- Restricted vent, pickup, hose or filter
- Kinked or softened line
- Incorrect or failed bulb
- Connector not opening correctly
- Fuel-system demand beyond the path's capacity
Those are diagnostic categories, not proof of one failed part. Stop repeated starting attempts if odor, wetness, a collapsing hose or unreliable fuel supply appears. Compare the symptom with the exact engine manual and arrange diagnosis when the cause is not clear.
Match connectors by system, not silhouette
Tank and engine quick connectors can differ by manufacturer, engine generation, thread, barb, seal material and flow arrangement. Even within one brand, a portable tank connector may not be the correct match for every engine-side fitting. A connector should latch positively, remain supported and pass the maker's inspection without seepage or air entry.
- Record the part numbers on both sides before buying.
- Inspect O-rings, seals, clips and locking surfaces as the instructions allow.
- Replace damaged mating halves when the maker requires a matched set.
- Do not grind, shim, tape or force a connector to make it latch.
- Do not use thread sealant unless the fitting instructions specify the exact product and location.
Route and support a fuel hose for a boat
A marine fuel hose for a boat needs protection along its full run. The route should preserve the manufacturer's bend radius, keep tension off connectors and avoid standing water, battery terminals, exhaust parts, hot engine surfaces, sharp edges, moving controls and places where feet or gear can crush it.
Federal requirements for clips, straps and clamps state that these parts must be corrosion resistant and must not cut or abrade the fuel line. The installation also needs enough access for inspection. Use the boat builder's existing supports where they remain serviceable, and replace damaged protection with the specified hardware rather than cable-tying the line to wiring or steering components.
- Lay out the path with the engine in its full steering and trim range.
- Check hatch, seat and storage movement before fastening anything.
- Keep the line visible enough for routine inspection.
- Support it at the locations and spacing specified by the boat or component maker.
- After assembly, use only the manufacturer's leak-check and starting procedure.
Inspect before each trip and during seasonal service
The condition of boat fuel lines can change through heat, age, fuel exposure, vibration, ultraviolet light, abrasion and repeated connection. A calendar age alone does not prove a hose is safe, and an uncracked exterior does not guarantee every internal layer or connector seal is healthy.
| Check | Normal expectation | Stop condition |
|---|---|---|
| Smell and visible area | No gasoline odor, staining or wetness | Fuel odor, sheen, drip or damp fitting |
| Hose surface | Consistent material with readable marking | Cracks, cuts, blistering, swelling, softness or hardening |
| Primer bulb | Correctly oriented and behaves as the manual describes | Cracked, leaking, permanently collapsed or unable to prime after checks |
| Connectors | Clean, supported, fully latched and dry | Loose latch, damaged seal, corrosion, seepage or air entry |
| Route | Protected from heat, edges, movement and crushing | Kink, abrasion, stretched section or contact with a hazard |
| Markings and history | Rating and part identity can be verified | Unknown hose, undocumented modification or mismatched parts |
Add this inspection to the Boat Maintenance Checklist and use the Outboard Motor Maintenance guide for the wider engine routine. A recurring hard-start, surging or power-loss symptom also belongs in the Common Boat Maintenance Problems guide, where fuel, ignition and mechanical causes stay separated.
The gasoline boat blower guide explains the four-minute pre-start ventilation rule and why the timer never overrides a fuel odor or leak.
How to respond to suspected fuel leakage
The supplied question research asks, “how do you detect a fuel leak on a boat?” Start with safe observation before the engine is started: look at accessible components for wetness, staining or physical damage and pay attention to gasoline odor. Do not disconnect a pressurized part, squeeze a leaking bulb, energize a circuit, start the engine or create a spark to confirm the suspicion.
- Keep passengers away and eliminate smoking, flames and other ignition sources.
- Do not start the engine or operate electrical equipment unless the vessel's emergency procedure specifically directs it.
- Ventilate only as the boat manual instructs and do not create sparks with unapproved equipment.
- Contain and report a spill using marina, local and environmental procedures.
- Have the source corrected and the full system checked before restarting.
The U.S. Coast Guard's Boater's Guide to Federal Requirements warns not to start an engine until all traces of fuel vapor are eliminated. If you are on the water and immediate danger exists, prioritize people, notify the appropriate emergency service and follow the vessel's emergency plan.
Owner inspection versus professional replacement
Owners can usually read labels, compare a replacement assembly with the engine documentation and inspect accessible portable-tank components. That does not make every replacement a simple DIY job. Fixed lines, inboard gasoline spaces, anti-siphon devices, filters, hidden runs, deteriorated fittings and undocumented modifications can involve fuel-vapor containment, ventilation, ignition protection and regulatory design.
Reasonable owner checks
- Read exact manuals and part markings
- Inspect accessible hose and connectors
- Confirm a factory assembly's model application
- Check routing and visible support
- Use the maker's pre-start inspection
Bring in a qualified technician
- Fuel odor or active leakage
- Fixed or hidden line replacement
- Inboard gasoline engine spaces
- Unknown modifications or missing labels
- Recurring starvation after basic checks
- Any pressure or leak test beyond the manual
Fuel compatibility includes every component
The fuel approved for a passenger vehicle is not automatically approved for a boat. The U.S. EPA's current E15 guidance says E15 cannot be used in nonroad vehicles such as boats. Follow the engine manual and pump label.
Ethanol compatibility is a complete-system question. The tank, hose, primer bulb, connector seals, filters and engine components all need to support the approved fuel. Replacing only the visibly damaged hose does not make older seals or connectors compatible. Never claim a higher ethanol tolerance than the exact manufacturers document.
Boat fuel-line checklist
- □ Record the exact boat, tank and engine models.
- □ Diagram the complete line from pickup to engine inlet.
- □ Read the hose's USCG type, inside diameter and manufacturer marking.
- □ Confirm the required rating and size for each location.
- □ Match tank-side and engine-side connectors by documented part number.
- □ Verify the primer bulb specification, arrow and condition.
- □ Protect the route from heat, abrasion, kinks, crushing and moving parts.
- □ Use only the specified fittings, supports and securing method.
- □ Inspect for odor, wetness, cracking, softness, swelling and loose connections before starting.
- □ Stop and obtain qualified help for leaks, fixed systems or undocumented modifications.
- □ Use only the fuel approved by the engine and complete fuel system.
Planning trip fuel after the system is sound? Use measured burn in the Boat Fuel Cost Calculator. Browse the Engine & Fuel collection only for exact products that have a published, source-checked review.
Related verified fuel-system product
Affiliate disclosure: If you buy through the Amazon link in this section, BoatOwner Hub may earn a commission at no extra cost to you. Product identity and specifications were checked from published sources; we have not claimed hands-on testing.

Attwood 8812LPG2 12-Gallon Fuel Tank
Why it is related: owners replacing or checking the complete tank-to-engine fuel path may also need to confirm the portable tank, outlet and available installation space.
Important limitation: this is a portable fuel tank, not a fuel-line kit. Its 1/4-inch NPT fitting interface does not prove that a hose, primer bulb or engine connector is compatible. Verify the complete system before ordering.
Confirm part number 8812LPG2, tank dimensions and every required connection.Related guides and tools
Boat Fuel Tank Guide
Compare portable and permanent tanks, capacity, venting, fit and connection planning.
Outboard Motor Maintenance
Place the fuel-line inspection inside a wider engine maintenance routine.
Common Boat Maintenance Problems
Triage hard starting, surging and power loss without assuming one failed fuel part.
Boat Fuel Cost Calculator
Estimate trip fuel cost from your own measured burn rate after the fuel system is sound.
Frequently asked questions
What size fuel line does an outboard need?
There is no safe universal size. Use the inside diameter, hose rating, connector family and maximum run specified by the exact outboard, boat and fuel-system manufacturers. A hose that physically fits a barb can still be wrong for the engine's fuel demand or the system's fittings.
Why will my boat's primer bulb not get firm?
Possible causes include an empty tank, a closed or obstructed vent where the system uses one, a reversed or damaged bulb, a loose connector, an air leak, a restriction or a problem elsewhere in the fuel system. Yamaha advises checking for a possible fuel-system leak when the bulb does not become firm. Do not keep running the engine or tightening random parts until the cause is identified.
Which direction should a primer bulb face?
Follow the arrow and the engine maker's instructions. On common outboard assemblies, the marked flow arrow points from the tank toward the engine. Keep the bulb and hose in the orientation and routing specified by the manufacturer rather than relying on a generic photo.
When should a boat fuel hose be replaced?
Replace it according to the manufacturer and whenever inspection finds cracking, hardening, softness, swelling, abrasion, a damaged rating mark, loose fittings, wetness or fuel odor. Stop using the system when leakage or vapor is suspected and have uncertain or permanently installed systems assessed by a qualified marine technician.
How do you detect a fuel leak on a boat?
Before starting, visually inspect accessible hose, bulb, fittings, filters and the tank area for wetness, staining or damage and use your sense of smell for gasoline odor. Never use a flame, spark or improvised pressure test. If odor or liquid fuel is present, do not start the engine or operate electrical equipment. Ventilate as the vessel manual directs and obtain qualified help.
Can E15 gasoline be used in a boat?
No. The U.S. EPA states that E15 cannot be used in nonroad vehicles such as boats. Follow the exact engine and fuel-system manuals for the permitted fuel grade and ethanol limit, and verify the pump label before fueling.
Sources and methodology
This guide uses current federal text and primary manufacturer maintenance guidance. It distinguishes regulatory design requirements, manufacturer instructions and editorial decision support. It does not replace the exact boat or engine manual and does not provide a universal installation recipe. No price, rating, sales, durability or hands-on testing claim is included.
- Electronic Code of Federal Regulations: 33 CFR Part 183, Subpart J, Fuel Systems
- U.S. Coast Guard: A Boater's Guide to the Federal Requirements for Recreational Boats
- U.S. EPA: E15 fuel registration and prohibited uses
- Yamaha Outboards: Fuel and fuel-system maintenance