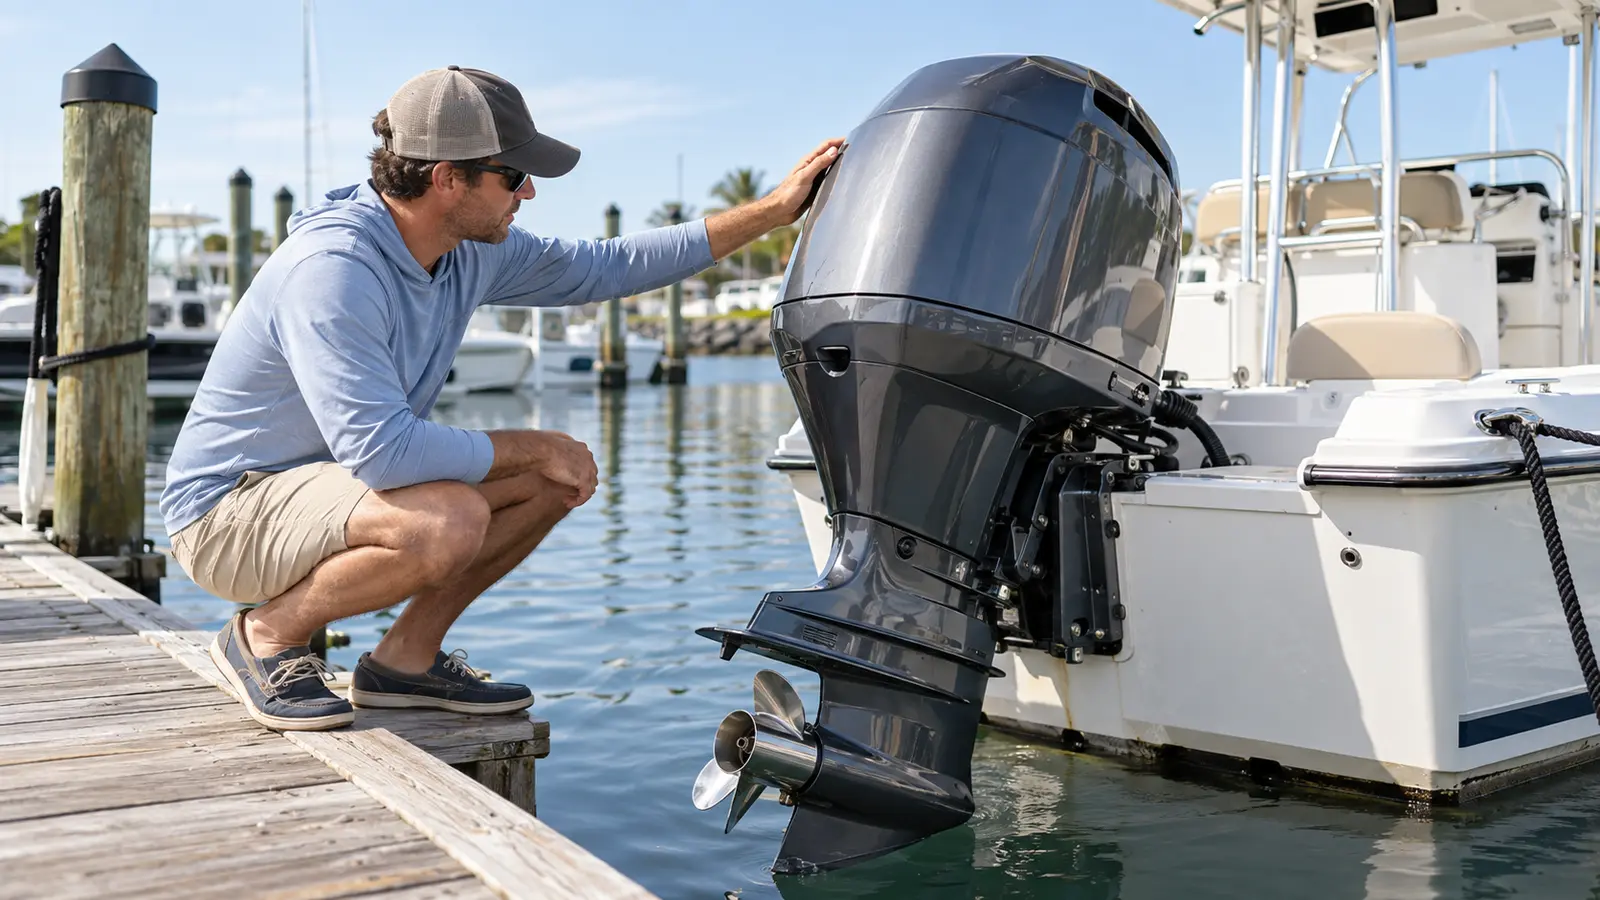
Good outboard motor maintenance is a repeatable system: inspect before running, flush and clean when the operating conditions require it, complete hour- and calendar-based service on schedule, and investigate warning signs instead of masking them.
Quick answer: What maintenance does an outboard motor need?
An outboard needs routine visual checks, model-approved freshwater flushing, fuel-system care, engine-oil and filter service on four-strokes, gearcase-lubricant service, propeller and shaft inspection, corrosion and anode checks, lubrication, cooling-system service and accurate maintenance records. The exact items and intervals come from the owner’s manual for the engine’s model and serial number.
There is no single schedule that fits every two-stroke, four-stroke, portable outboard and high-horsepower engine. Yamaha’s general maintenance resource, for example, highlights regular flushing and 100-hour engine- and lower-unit-oil service, while Mercury tells owners to use the inspection and maintenance schedule in the exact engine manual. Treat those broad intervals as examples—not permission to override your manual.
Start with the exact manual and engine identity
Before buying oil, filters, spark plugs or a water-pump kit, record the model, serial number, year, operating hours and whether the engine is a two-stroke or four-stroke. That information controls the fluid specifications, capacities, service parts, torque values and procedures.
Download or keep the operation and maintenance manual aboard. Mercury’s manual finder uses the serial number on the transom bracket, and Honda provides free owner-manual downloads by model family. If a previous owner cannot document the last service, establish a baseline with an inspection and the overdue manual-specified work rather than assuming a sticker or clean cowling proves the engine is current.
A practical outboard maintenance schedule
| When | Owner checks | Why it matters |
|---|---|---|
| Before every trip | Look for fuel, oil or water leaks; inspect the propeller, skeg, cowling, wiring and mounting hardware; check engine oil where applicable; confirm steering and controls move normally. | Catches visible problems before the engine is under load. |
| At startup | Follow the approved starting procedure, watch gauges and alarms, and confirm the cooling-water indicator behaves normally. | Overheating or lubrication warnings need immediate attention. |
| After use | Follow the model’s freshwater-flush instructions when required, rinse salt and dirt from the exterior, let surfaces dry and record anything unusual. | Reduces salt, debris and corrosion exposure. |
| Regularly in season | Inspect anodes, propeller shaft, fuel components, battery connections, control linkages, trim-and-tilt area and corrosion protection. | Finds gradual deterioration before it becomes a breakdown. |
| At hour/calendar intervals | Complete the manual’s engine-oil, oil-filter, gear-lube, fuel-filter, spark-plug, lubrication, water-pump and other scheduled work. | Time can age parts and fluids even when operating hours are low. |
| Before storage | Use the maker’s fuel, corrosion, internal-protection, battery and storage-position procedure. | Prevents stale fuel, trapped water and off-season corrosion. |
Before every outing: five minutes that prevent bad days
- Walk around the engine. Look for new impact marks, loose fasteners, damaged cables, leaks and anything wrapped around the propeller.
- Check the mounting and steering. The engine should sit securely on the transom and the steering should move without binding, unusual play or fluid leakage.
- Inspect the fuel path. A gasoline odor, cracked hose, soft or deteriorated primer bulb, wet connection or leaking filter is a stop condition—not a reason to “try it once.”
- Check fluid levels as the manual directs. Four-stroke engine-oil readings depend on engine position and procedure. Overfilling can be harmful, so do not add oil from appearance alone.
- Test the controls and emergency stop. Confirm the shift and throttle controls, warning system and emergency-stop lanyard function according to the manual before leaving the dock.
Flush and rinse without damaging the engine
Honda says to clean and flush the outboard with fresh water after operating in dirty or salt water. Yamaha likewise describes freshwater flushing as a way to remove debris and reduce corrosion. The important detail is that flushing connections and engine-running rules vary: some procedures use a built-in flush port with the engine off; others use muffs or another adapter and require a specific engine position and water flow.
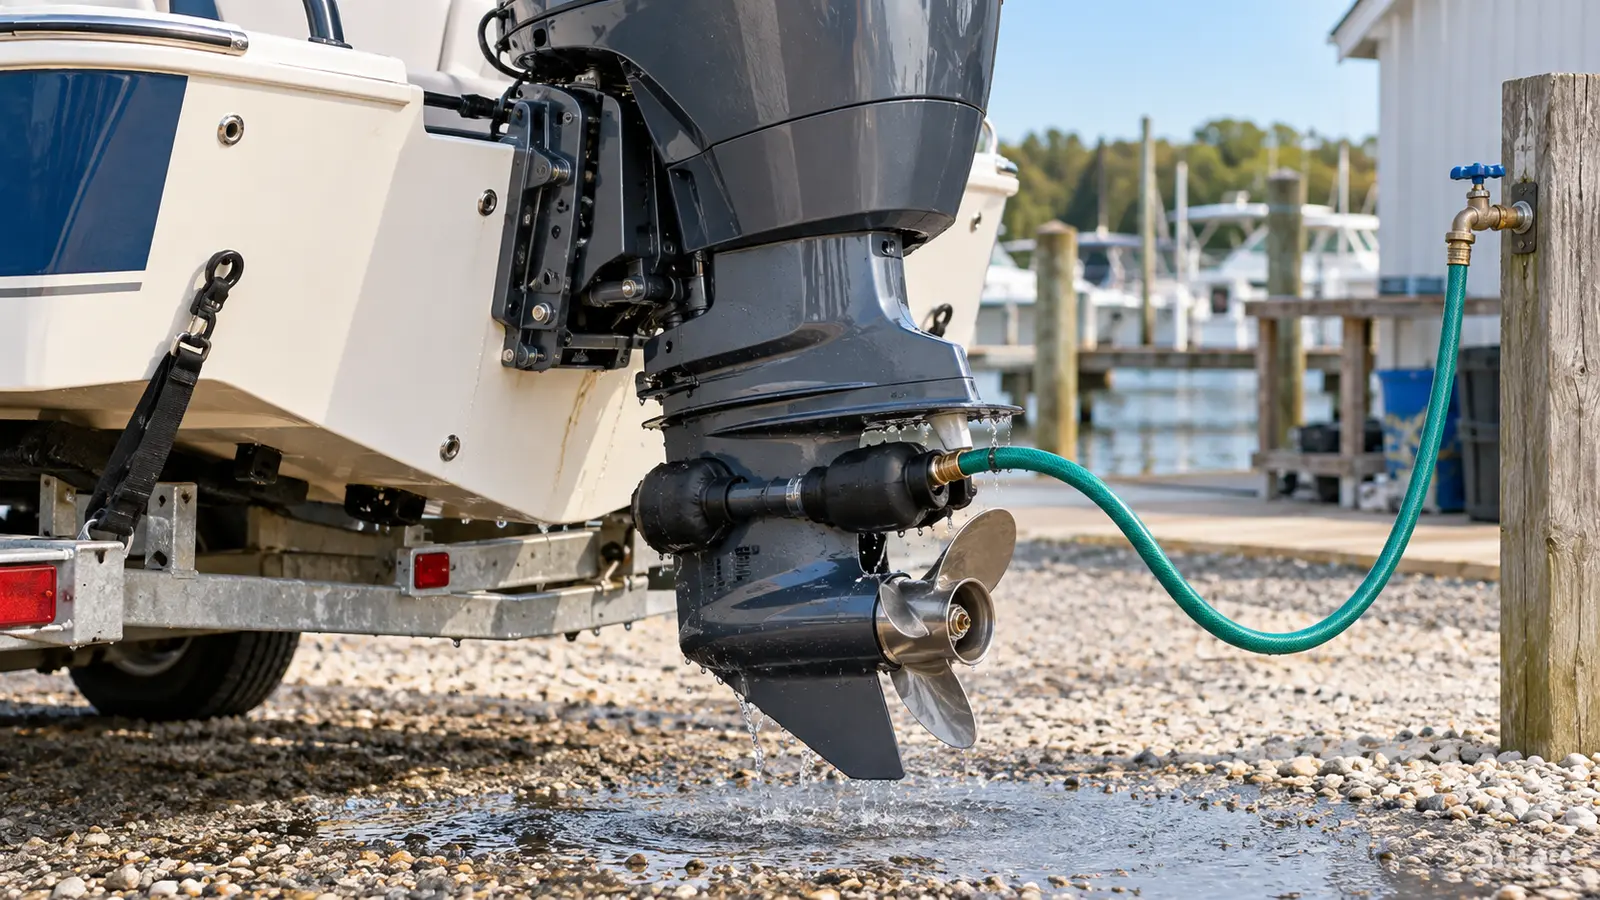
- Move the boat outdoors and keep the area clear of exhaust, people and loose gear.
- Confirm the water-supply method before starting the engine.
- Never rev an unloaded engine to “speed up” flushing.
- Watch for overheating alarms or an abnormal cooling-water indicator and shut down if anything is wrong.
- Rinse exterior salt and grime with fresh water, then dry and inspect chipped paint or exposed metal.
A visible telltale stream is useful, but it does not prove every cooling passage, thermostat or water-pump component is healthy. Persistent heat, weak flow or alarms need diagnosis.
Engine oil, filter and gearcase lubricant
Four-stroke engine oil
Use the viscosity, specification, filter and capacity listed for the engine. Warm-up, draining, filter replacement and final level-check procedures differ. Record the date and engine hours, and inspect drained oil for unusual contamination. Two-stroke outboards use different lubrication systems; do not apply a four-stroke oil-change procedure to them.
Lower-unit gear lubricant
Gearcase service is more than replacing lubricant. It is also an inspection opportunity. Milky lubricant can indicate water intrusion, while unusual metal or a damaged drain-plug seal may justify further evaluation. Use the specified lubricant and fill method; incorrect venting or level can leave the case improperly filled.
Inspect the propeller and shaft safely
Disable the engine so it cannot start, then wear gloves and inspect the propeller for bent blades, cracks, heavy impact damage and fishing line near the shaft. A damaged propeller can create vibration and reduced performance. Line behind the propeller can damage the shaft seal even when little is visible from the outside.
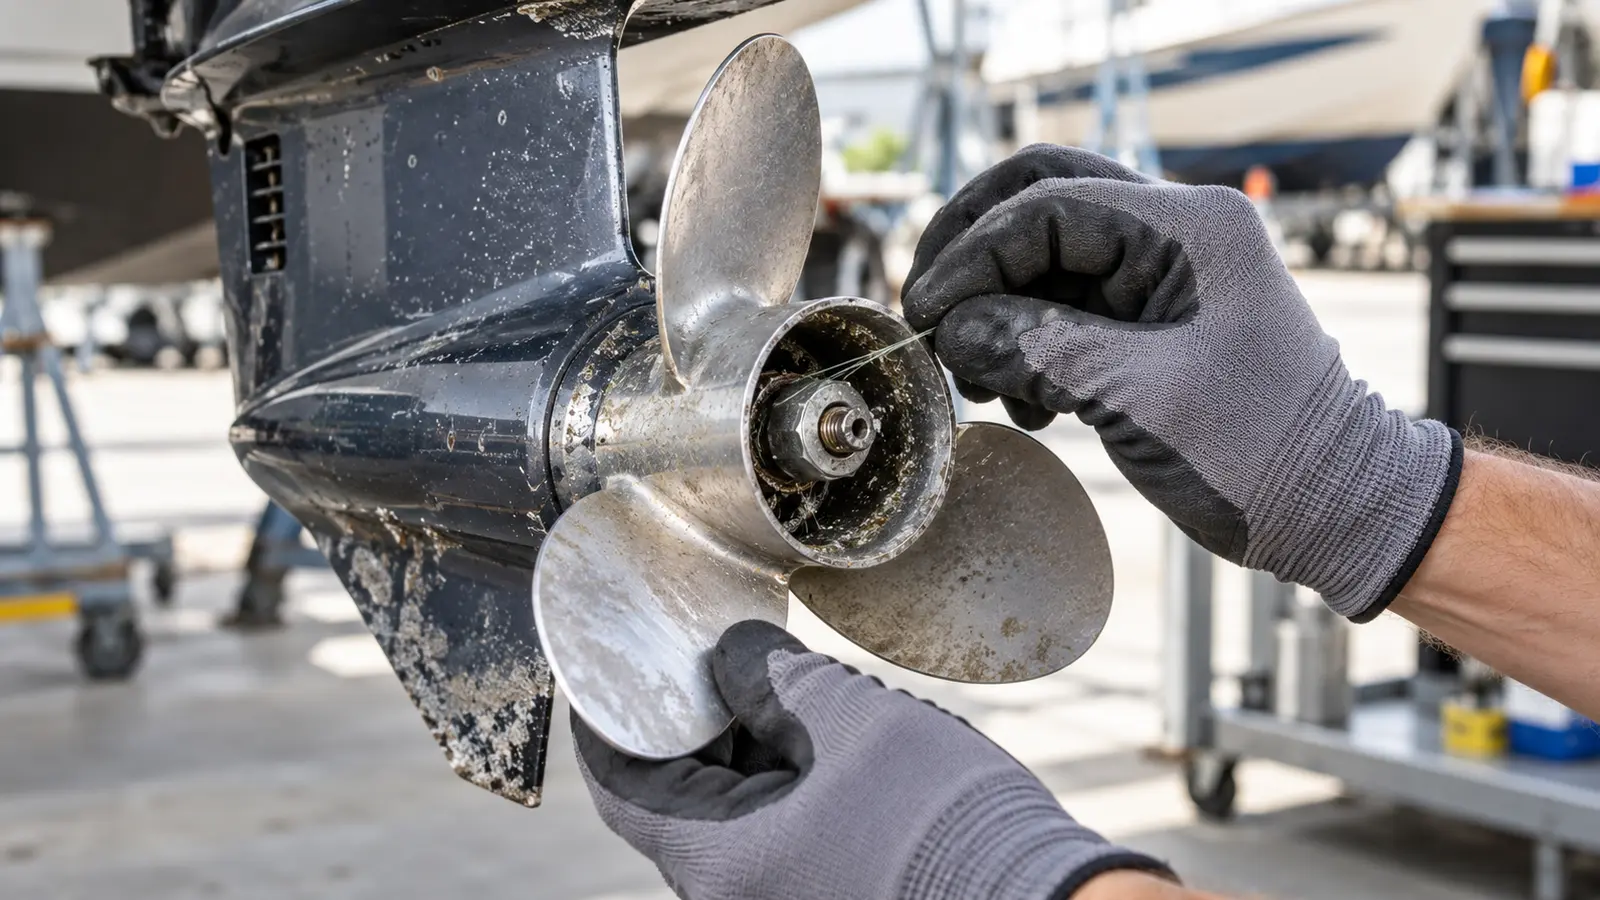
If removal is permitted for your model and skill level, follow the exact hardware order, torque and cotter-pin or locking-device instructions. Major blade damage, shaft play, persistent vibration or suspected seal damage belongs with a propeller or marine service professional.
Protect the fuel system
Fuel problems can look like ignition or mechanical failures. Inspect hoses, connections, primer bulbs, tank vents and filters at the intervals in the boat and engine manuals. Replace components with marine-rated parts that meet the engine maker’s specifications.
For storage, do not assume that every manufacturer recommends the same tank level or treatment. Use fresh fuel of the required grade, measure stabilizer only when the manual calls for it, and circulate treated fuel using the approved procedure. Never work around gasoline in an enclosed space or near sparks, smoking, heaters or other ignition sources.
Control corrosion, especially after salt water
Inspect sacrificial anodes regularly and use the correct material for the water where the boat operates. Do not paint anodes, and do not replace them with an unverified alloy. Check chipped paint, fasteners, tilt hardware and under-cowling areas for early corrosion.
Honda’s saltwater guidance emphasizes freshwater cleaning, prompt paint repair, lubrication and regular attention to the water pump and thermostats. It also warns against spraying corrosion inhibitor on belts, the alternator, oxygen sensors or anodes. That is a useful reminder that “more spray” is not automatically better; apply only approved products to approved locations.
Battery and electrical checks
Loose, corroded or overheated connections can cause slow cranking and charging problems. Inspect cables, boots, terminal protection and engine harnesses without bypassing fuses or modifying factory wiring. Confirm the battery type and charging requirements before connecting a charger.
Use our guides to charge a boat battery safely, check resting voltage with a multimeter and diagnose a boat battery that keeps dying. A voltage reading alone does not prove available starting capacity.
What is usually reviewed at annual or 100-hour service?
Many outboards use an annual-or-hourly service structure, but the list and interval are model-specific. A service may include engine oil and filter on four-strokes, gear lubricant, fuel filters, spark plugs, lubrication points, anodes, propeller-shaft inspection, battery and cable checks, control adjustments, diagnostic history, water-pump or thermostat service and a broader leak and corrosion inspection.
Use the broader boat maintenance checklist to coordinate the engine with hull, safety-equipment and trailer work, and the maintenance cost guide to build a realistic annual budget.
DIY or marine technician?
| Reasonable owner work when the manual permits | Use a qualified technician |
|---|---|
| Visual inspections, cleaning and recordkeeping | Fuel leaks, persistent gasoline odor or deteriorated fuel plumbing |
| Manual-approved flushing and exterior rinsing | Overheating, repeated alarms or weak cooling performance |
| Propeller-area inspection with the engine disabled | Gearcase water intrusion, shaft damage or heavy vibration |
| Simple scheduled tasks you can complete exactly | Steering faults, internal repairs or procedures you cannot verify |
| Battery charging with compatible equipment | Burned wiring, repeated fuse failure or charging-system faults |
Keep a maintenance log that is actually useful
Record the date, engine hours, work performed, part numbers, fluid specifications and quantities, findings, receipts and next due time. Photograph the serial label and the condition of the propeller, anodes and drained gear lubricant when useful. A good log supports troubleshooting, warranty conversations and resale value.
For seasonal shutdown, pair this routine with the complete boat winterization guide. Winterization is not a substitute for overdue maintenance; it is the storage layer added after the engine is inspected and serviced correctly.
Outboard motor maintenance checklist
- ☐ Record model, serial number and engine hours.
- ☐ Keep the correct owner and maintenance manual available.
- ☐ Inspect for fuel, oil and water leaks before use.
- ☐ Check the propeller, skeg, mounting and steering.
- ☐ Verify alarms, controls and the emergency-stop lanyard.
- ☐ Flush and rinse according to the operating conditions and manual.
- ☐ Inspect anodes, chipped paint and corrosion-prone areas.
- ☐ Complete oil, filter, gearcase and lubrication service on schedule.
- ☐ Inspect the fuel system and use the approved storage procedure.
- ☐ Check battery cables, connections and charging compatibility.
- ☐ Investigate abnormal noise, vibration, heat, smoke or performance.
- ☐ Log completed work and the next time/hour interval.
Frequently asked questions
How often should an outboard motor be serviced?
Follow the inspection and maintenance schedule for the exact engine model. Service is commonly triggered by both operating hours and elapsed time, so complete whichever interval arrives first.
Should you flush an outboard after every use?
Follow the engine manual. Manufacturers commonly call for freshwater flushing after saltwater, brackish or dirty-water operation, using the connection and engine-running instructions specified for that model.
Can you maintain an outboard motor yourself?
A careful owner may be able to perform visual inspections, cleaning and manual-approved routine tasks. Fuel leaks, major electrical faults, overheating, steering problems, internal repairs and unclear procedures belong with a qualified marine technician.
What are the warning signs that an outboard needs service?
Warning alarms, overheating, a weak or absent cooling-water indicator, hard starting, rough running, fuel odor, fluid leaks, unusual vibration, milky gear lubricant, damaged wiring or reduced performance all justify diagnosis before continued use.
Is outboard maintenance different in salt water?
Yes. Salt exposure increases the importance of freshwater flushing, rinsing, corrosion inspection, lubrication and anode checks. Use the engine maker’s saltwater instructions because products and intervals vary by model.
Sources and methodology
BoatOwner Hub compared maintenance guidance from multiple outboard manufacturers and kept model-specific procedures out of the general checklist. Your exact engine manual remains the controlling source.